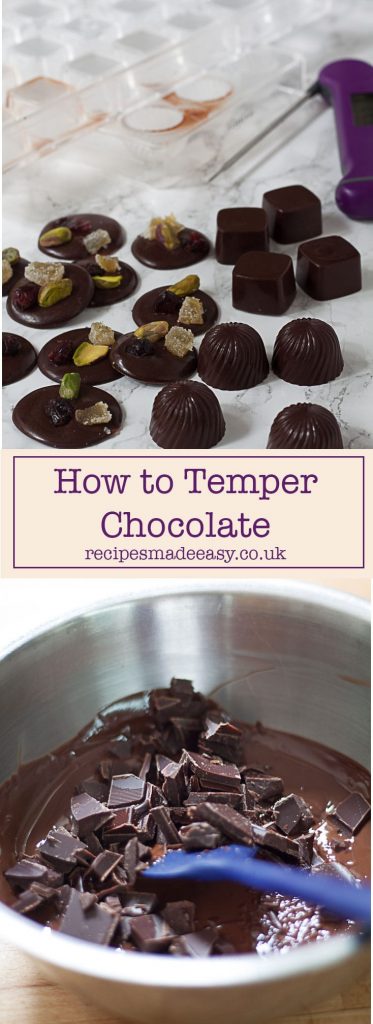
To get a perfect finish when working with chocolate you will need to temper chocolate. The seeding method is probably the easiest method to use at home.
WHAT IS TEMPERING CHOCOLATE?
Tempering chocolate is the process of heating and cooling chocolate so that it sets to a crisp, shiny finish. It gives chocolate that characteristic snap when you bite into it. Untempered chocolate has no “bite”, will look dull, and may develop a bloom (spotty dull white colour) which spoils the appearance.
Chocolate can be tempered in a number of ways. Traditionally, the chocolate would be heated to the correct temperature and then cooled by spreading it backwards and forward on a marble board. Needless to say this is not easy and has the potential to be very messy.
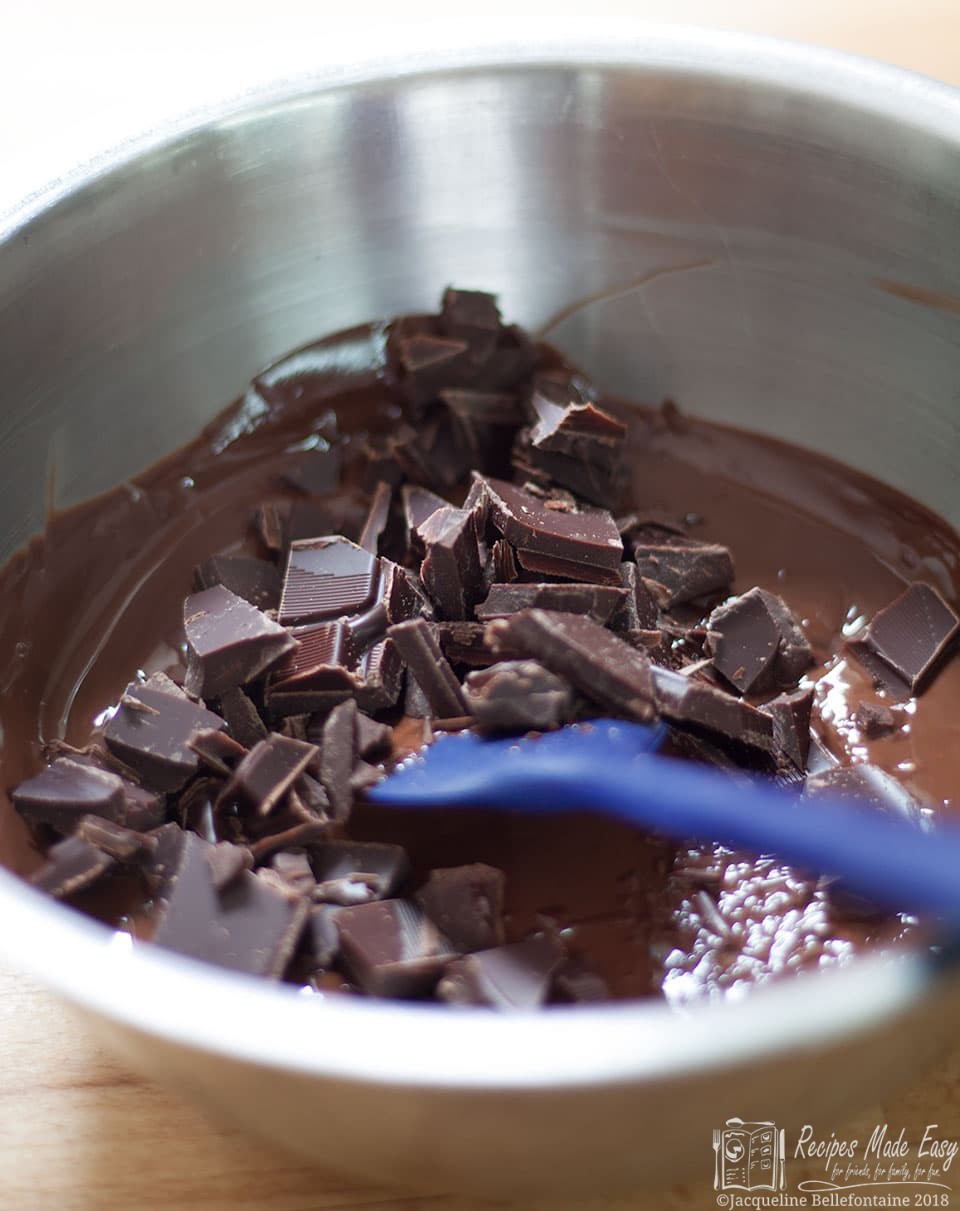
The easiest way to temper chocolate at home is by following a process called “seeding”. Melt about two-thirds to three-quarters of the chocolate slowly over a low heat. Once it is melted, add the remaining chocolate and stir until it melts. This will cool the chocolate and it will begin to thicken. The "seed" chocolate not only cools the chocolate but helps set the molecules in the chocolate into the correct crystalline structure that gives the chocolate it's characteristic snap.
Step by Step Tempering Chocolate
- Bring a saucepan with a couple of inches of water to a simmer over a medium low heat. Place a bowl on the pan, making sure its base doesn’t touch the water.
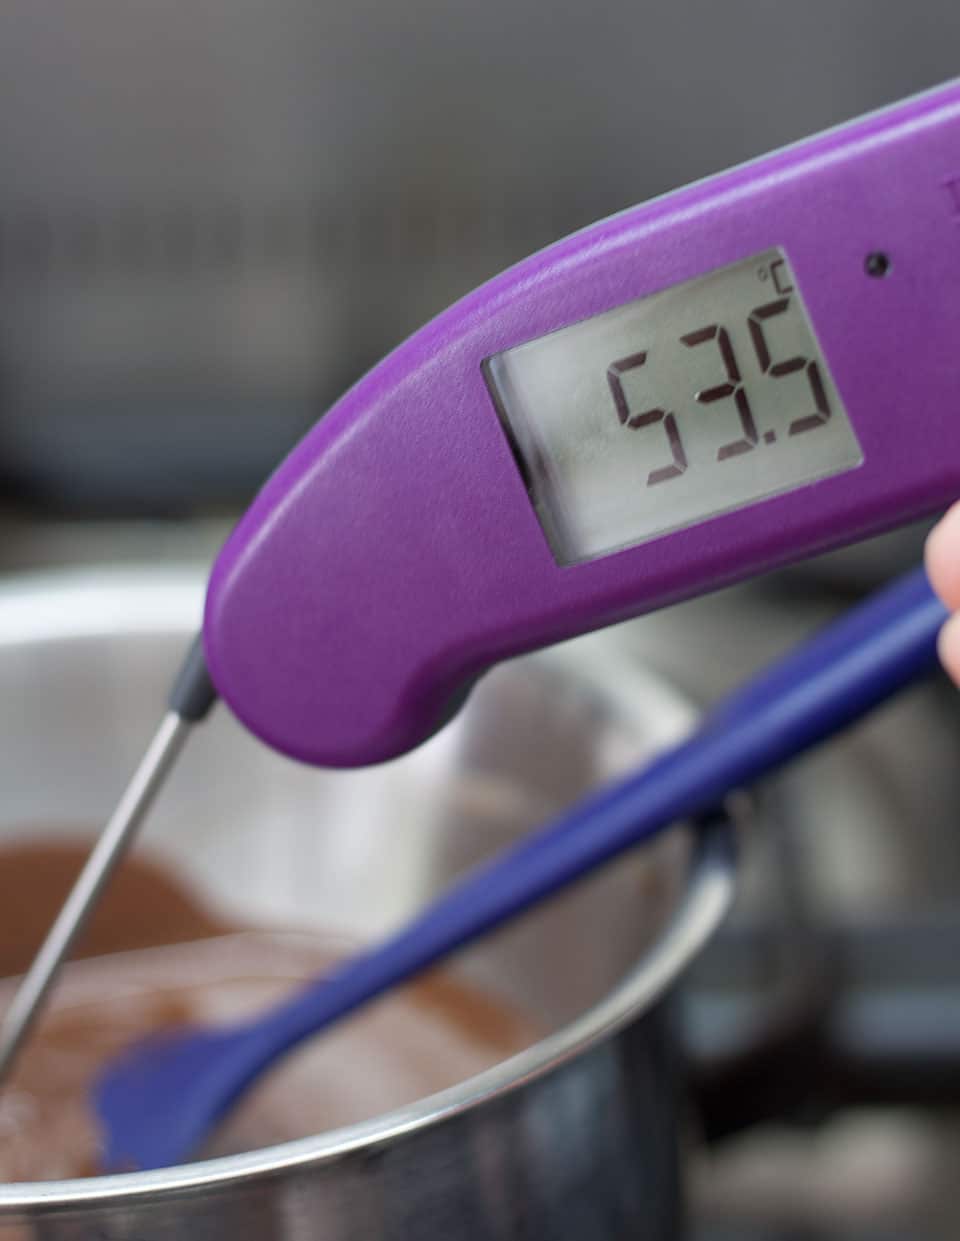
- Place about three quarters of your finely chopped chocolate into the bowl. Melt the chocolate while stirring constantly. The chocolate should reach a temperature of between 45/48°C (113/118°F)
for milk and white chocolate, 53/55°C (127/131°F) for dark chocolate. It will be quite runny at this stage. You can keep it at this temperature for some time should you wish.
- When you are ready to start working with your chocolate, remove the bowl from the heat and wipe the base of the bowl. Although the bowl was not touching the water, it will be wet from steam. If any moisture gets into the chocolate it will seize, become grainy and can not be rescued. Getting into the habit of immediately wiping the base is good practice and will help prevent disasters.
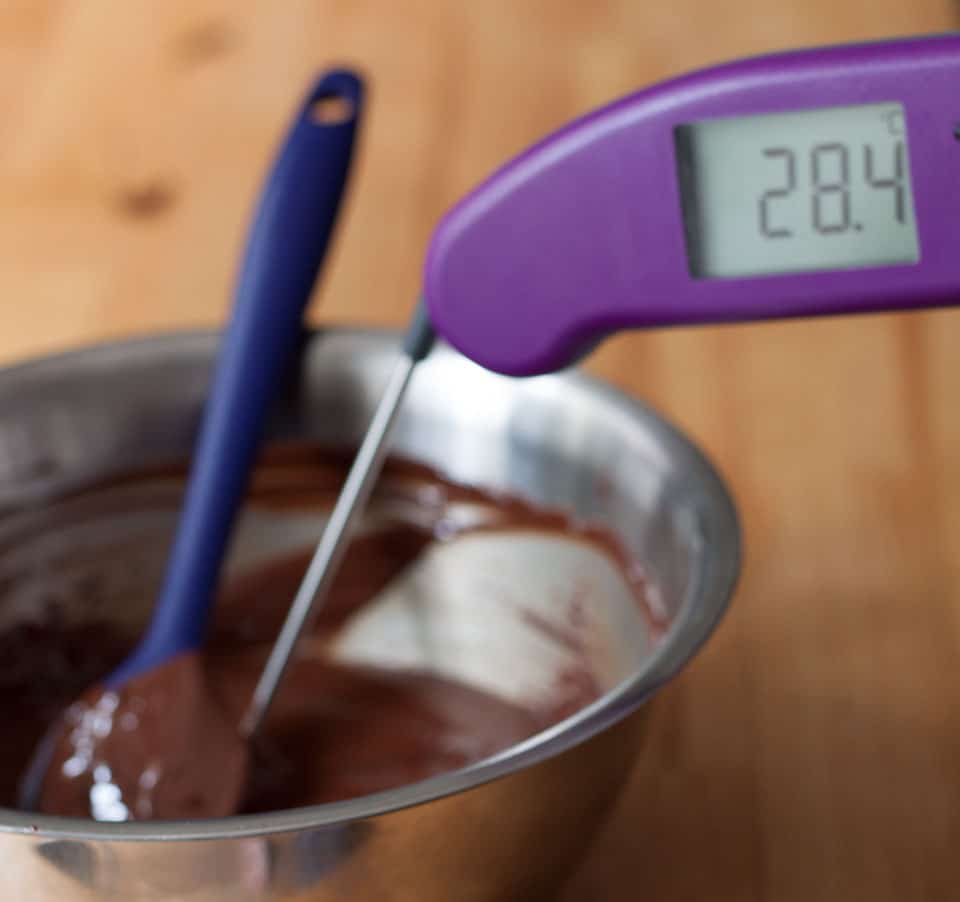
- Add the remaining chocolate.Stir vigorously, breaking the chocolate down with the spatula until all the chocolate has melted. The chocolate should cool to between 27/28°C (80/82°F) for milk and white chocolate, 28/29°C (82/84°F)for dark chocolate.
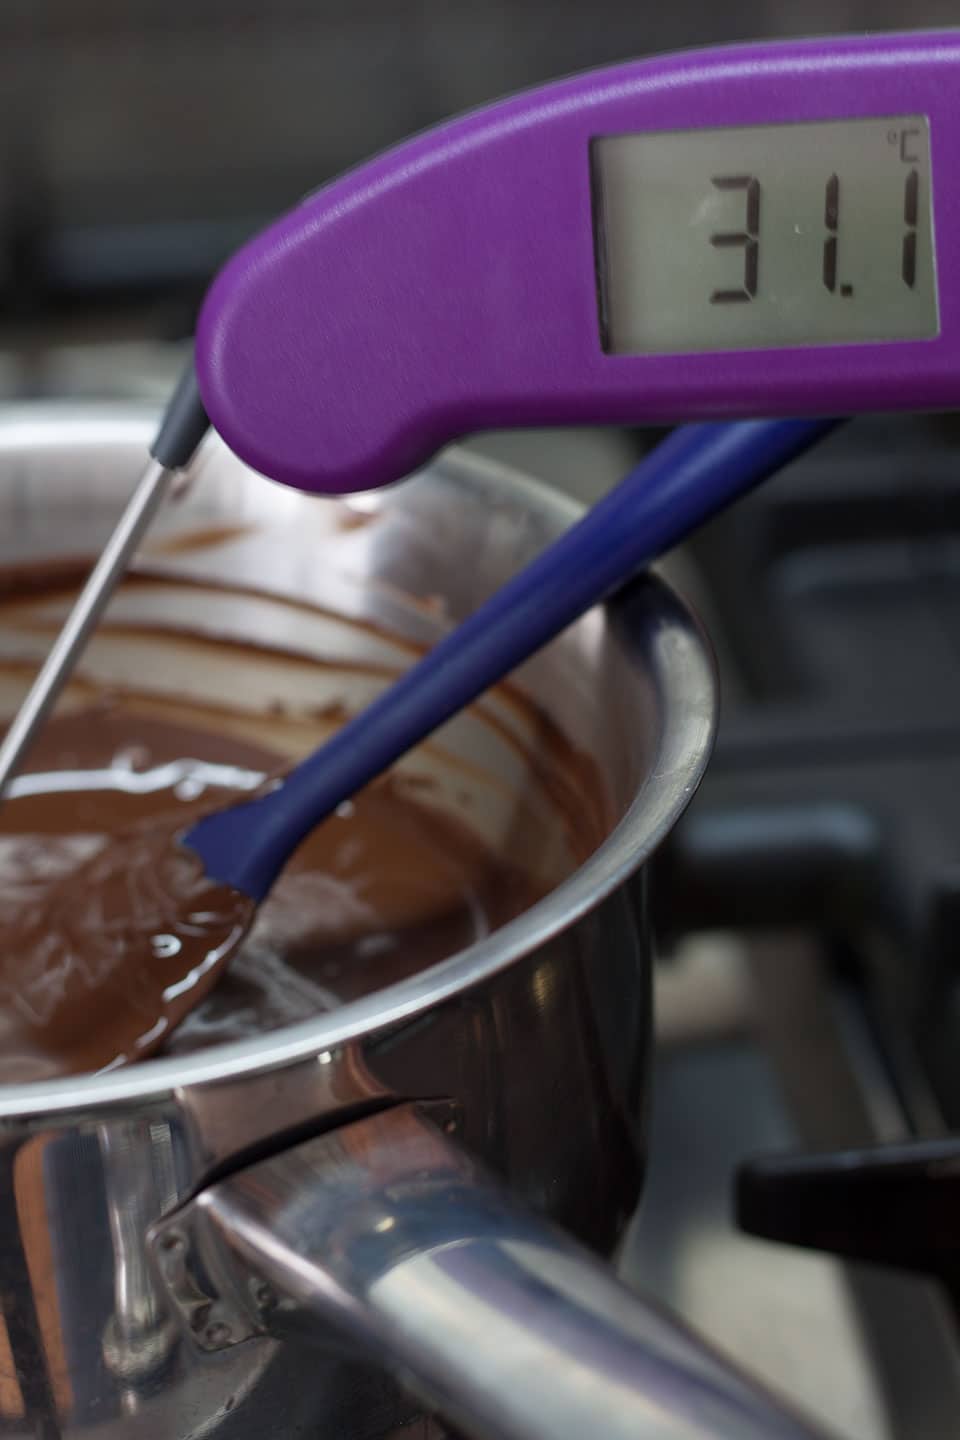
- At this point it will be quite thick and viscous, so place the bowl back on top of the saucepan of water and heat very gently whilst stirring to 29/30°C (84-86°F) for milk and white chocolate, 31/32°C (87/89°F) for dark chocolate. There may be enough heat left in the water without returning the pan to the heat.

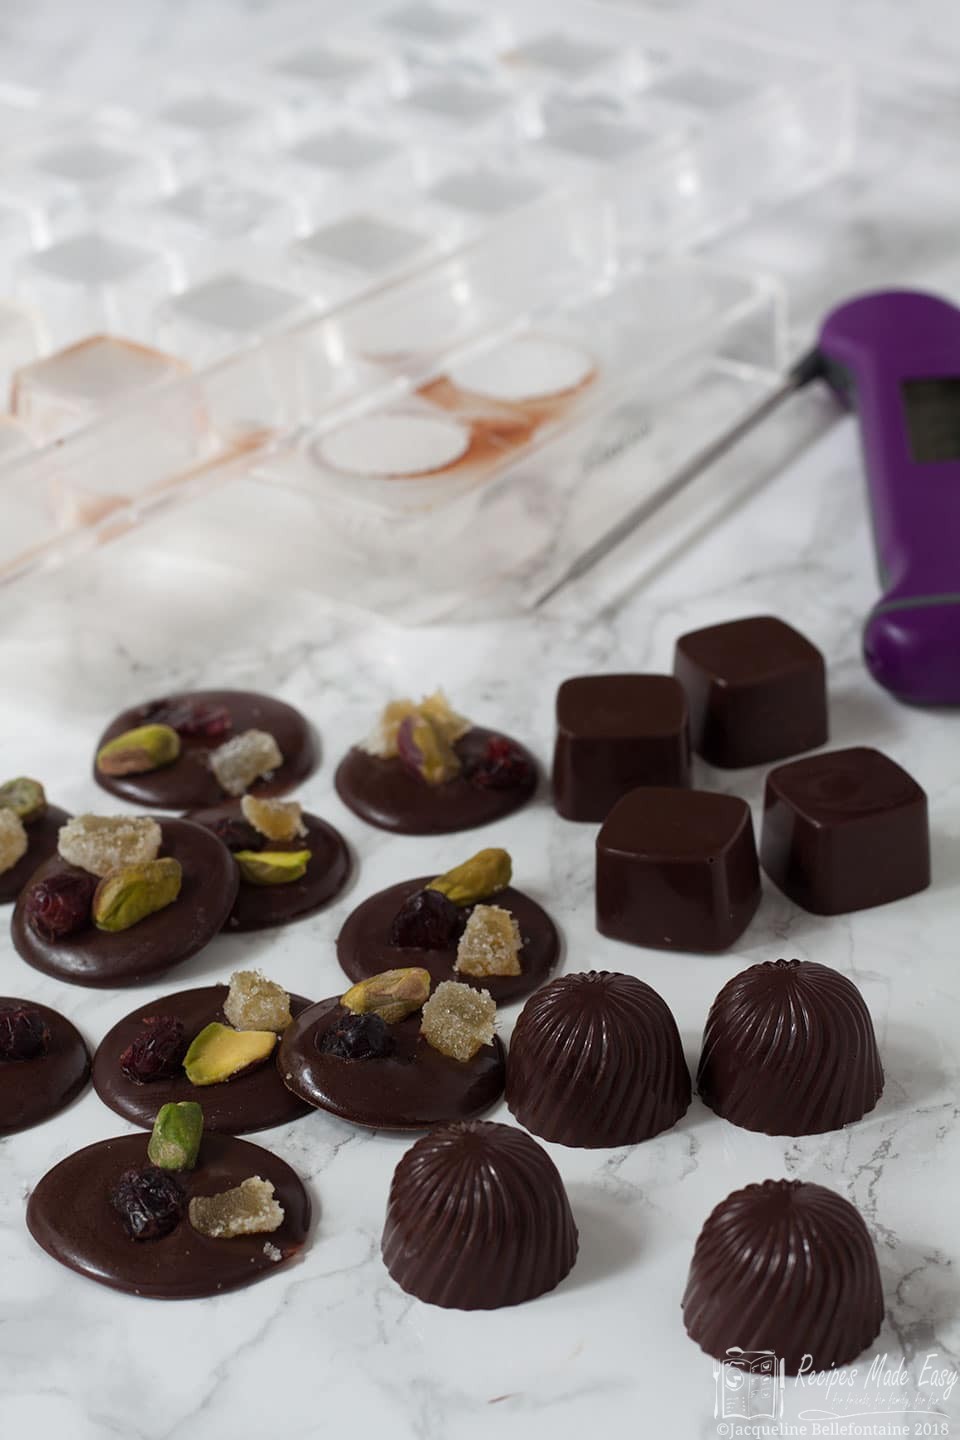
Test the chocolate to check it is tempered correctly by drizzling a small amount on a palette knife. It should set hard within 5 minutes and be shiny and glossy.

Hints and Tips when Tempering Chocolate
- While using a thermometer is not essential, it takes the guess work out of the process. I have used a Thermapen thermometer for several years now and have found it very reliable. Other thermometers should work too.
- Before you start, make sure all of your equipment is completely clean and dry. As mentioned above, water is like death to chocolate. Make sure your hands are dry too and do not be tempted to lick your fingers while you work.
- It is always easier to temper and work more chocolate than you need. Reason being that it is easier to control the temperature of the chocolate. A small amount can overheat very quickly. When filling moulds and dipping truffles it is far easier if you’ve got more than enough. When you have to start scraping around for every last bit of chocolate things can quite literally get messy and can spoil the end result.
- Unused chocolate can be tipped onto a piece of baking parchment and allowed to set. Wrapped and stored in a cool dry place it will keep for a few months and can be tempered again when required. Or you could make Mendiants (small chocolate discs) .
- NEVER hurry the melting process. You can even leave the chocolate melted for several hours before beginning the cooling process. Although you might not want to leave it that long, it is essential that you let the chocolate melt slowly.
- Place the chocolate in a bowl over a pan of hot water, making sure the water is not touching the base of the bowl as this may cause the chocolate to become too hot.
- The type of bowl you use will effect the process. I generally use metal bowls. They conduct the heat very well and get very hot very quickly. You will need to take care not to let the chocolate overheat. I remove the saucepan pan from the heat source during the melting process and only return it to the heat if absolutely necessary. On the upside, when it comes to the cooling part of the process the bowl does not retain its heat and can help speed up the cooling.
- Glass bowls are less prone to quick fluctuations of temperature, so are less likely to overheat the chocolate. On the downside they retain the heat for longer so the cooling process is slower.
- While you can leave the chocolate in its melted state for some time, once it has been tempered it sets much more quickly than chocolate that has simply been melted. Get everything you need together before you start to cool the chocolate.
- If the chocolate starts to harden before you have finished working with it, quickly pop it back onto the heat to very slightly warm through until workable again. You will be fine doing this once or possibly twice but do try to work quickly and efficiently for best results..
- If I’m melting chocolate that doesn’t need to be tempered for example to go into a cake, or to make a cheesecake or mousse, I use the microwave because it is quicker. For any recipe where you need a good finish to the chocolate I strongly recommend against using the microwave and melt on a low heat as above.
- Because chocolate is affected by both heat and moisture try to work in cool dry conditions. If Your kitchen is very hot and steamy it will be very hard to get good results. Cold damp days when the can also be a problem.
Jen says
I generally dread tempering chocolate but I followed your directions and everything worked beautifully.
Jacqueline Bellefontaine says
Delighted to hear it. Tempering can always be a bit temperamental but I have found this method the most reliable.
Jhuls says
I have tried tempering chocolate and it was a complete failure. Thanks for sharing this useful post. 🙂
Jacqueline Bellefontaine says
Good luck next time, it can be frustrating I know. I know chocolate can be a little tricky as it is affected by so many things, including the humidity and temp on the day. Sometimes when i really cant work out where it went wrong, I just put failure down to the Chocolate gods who like to keep the upper hand. But with practice it gets easier:) Dark is easier so start with that.
Angela / Only Crumbs Remain says
Such a helpful post Jacqueline, the sheen and wonderful colour on those chocolates looks amazing! What brand of chocolate do you use for your tempering work?
Angela x
Jacqueline Bellefontaine says
I use callebaut which I buy from http://www.chocolatetradingco.com
When I was on something sweet I used to buy about 10kg at a time. Now I just buy 1 kg bags. Its very good chocolate for the price.
Benny says
I had no idea how many things could go wrong when trying to temper chocolate. Then again, I've never tried tempering chocolate. I bookmarked this page so I know where to come back to when I try it out!
Jacqueline Bellefontaine says
It's not as hard as it sounds. While sometimes you can get away with just melting and cooling I think it is well worth taking a few extra steps to ensure you get really good results.